Fan

Top 5 Ceiling Fans of 2015 by Paula

Paula Ables Interiors would like to celebrate our top 5 favorite Ceiling Fans of 2015. How did we decide our favorites, you might ask?  We took a lot of key features into consideration:  Color, Texture, Aesthetics, and Function.

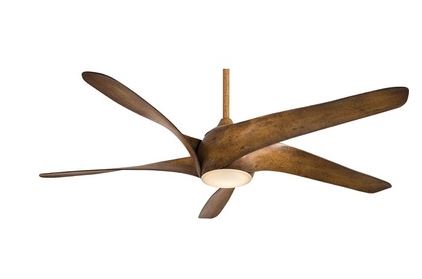
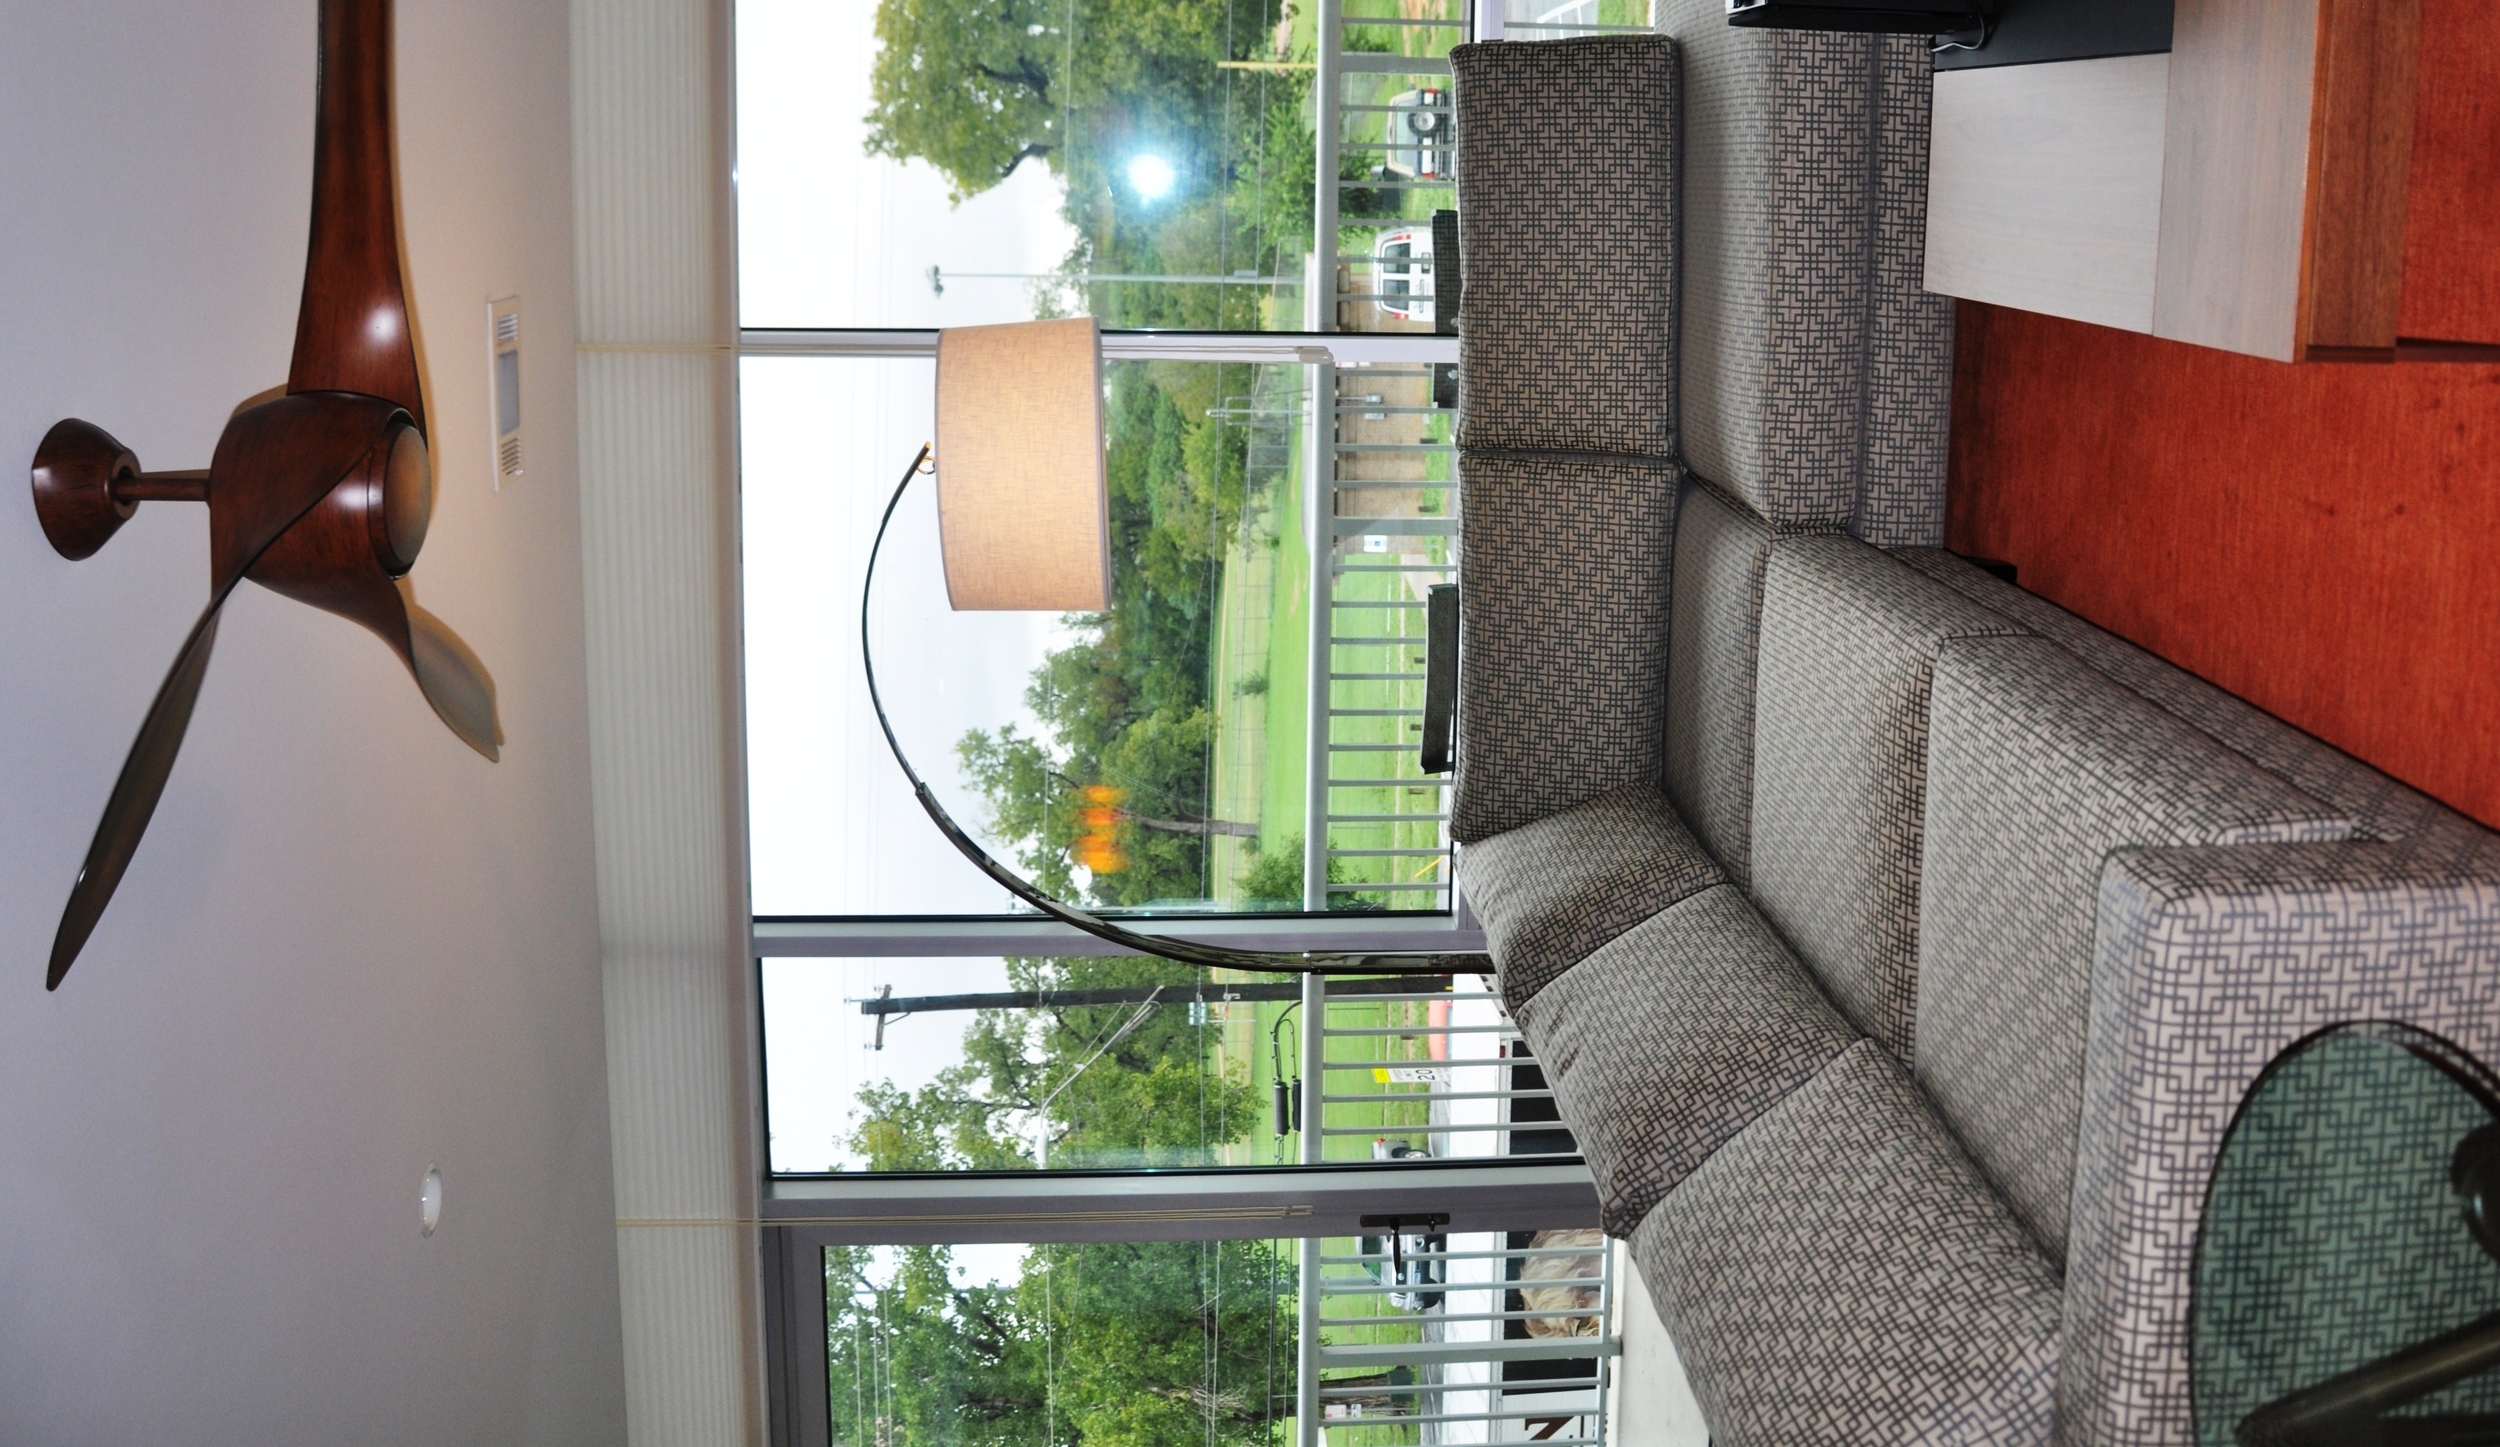
#1  Artemis XL5 Fan by MinkaAire

This striking fan is available in a variety of sizes and colors including transparent.  Our favorite is as pictured:  54", 5 Blade fan made from Distressed Koa Wood.  You can get it with or without the light.  A little on the pricier side of things, but we think its unique appearance and balance make it worth the expense.  This fan could be used in your more public spaces such as the Great Room or Game Room or it would be a nice addition to any Master Bedroom.

Ceiling fans


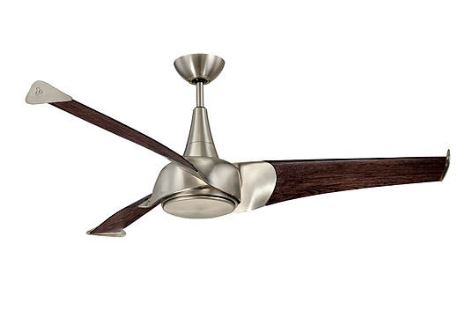
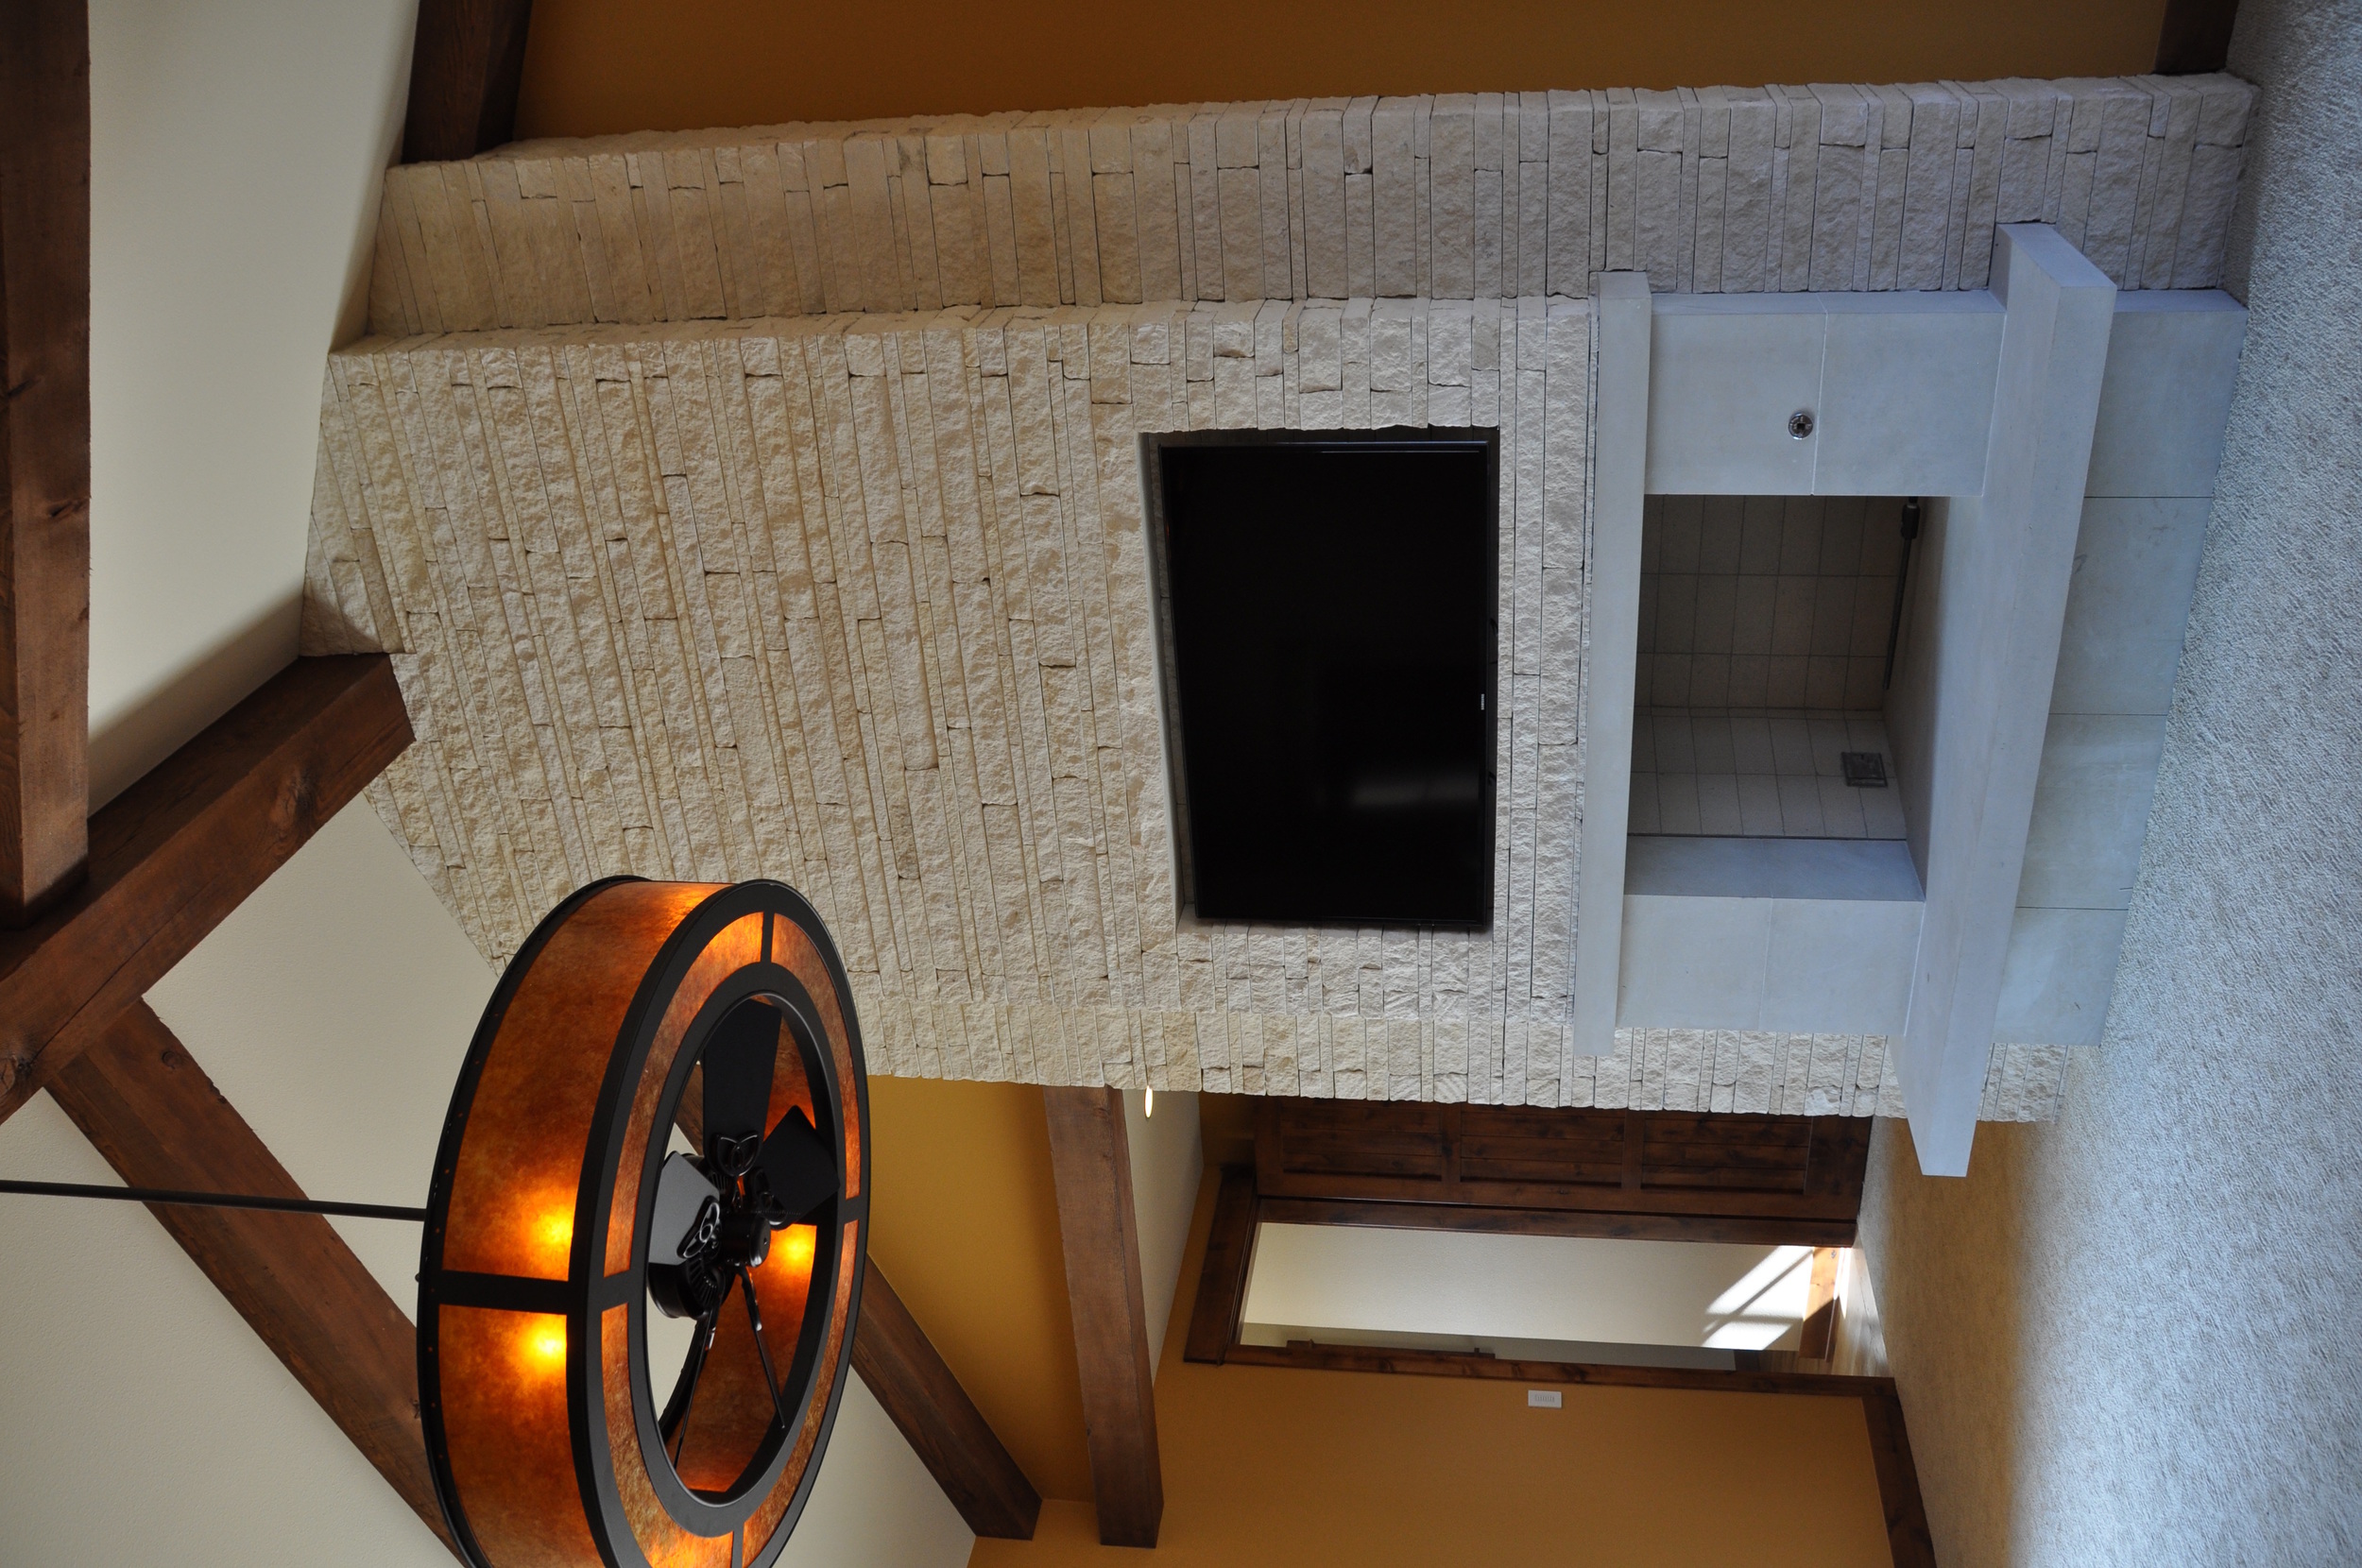
#2 Haiku Fan by Big Ass Fan Company

The Big Ass Fan Company has added Residential Interior fans to their list of successful and dramatic fans.  This fan is offered in a variety of sizes and color combinations as well.  We think the Caramel bamboo with black hardware (as pictured)give it a dramatic flare.  This fan tops the list as the priciest of the fans listed, but with a name and reputation like Big Ass Fan, I would expect no less.  This fan with its more contemporary, masculine look is great for a Game Room, Man Room or Office space.


Ceiling Fans


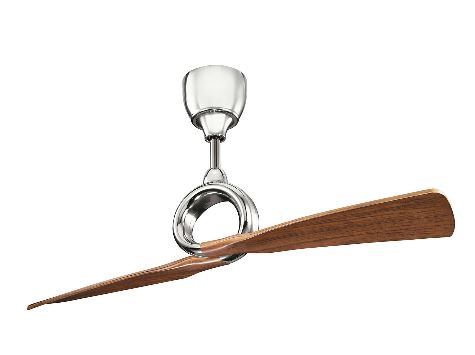
#3 Ariel Fan by Savoy House

The Ariel is available in a variety of sizes, but for color, this is it.  We love the unique styling of this fan with the addition of the "winglets" which help to produce 20% more airflow and 205 less energy consumption than comparable fans.  We like to use this fan in smaller rooms such as Secondary Bedrooms and Tv Rooms.


Ceiling Fans

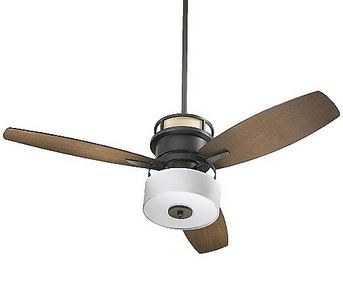
#4 Bristol Fan by Quorum International

The Bristol fan is available in a variety of colors and can come with or without the lower light kit.  We like to see this fan with the light kit as pictured.  This fan is great in kids rooms and baby rooms where a nightlight might come in handy.  The upper area of the fan is a separate light that can be dimmed to a soft glow to provide a warm, cozy feeling to any room.

Ceiling Fans#
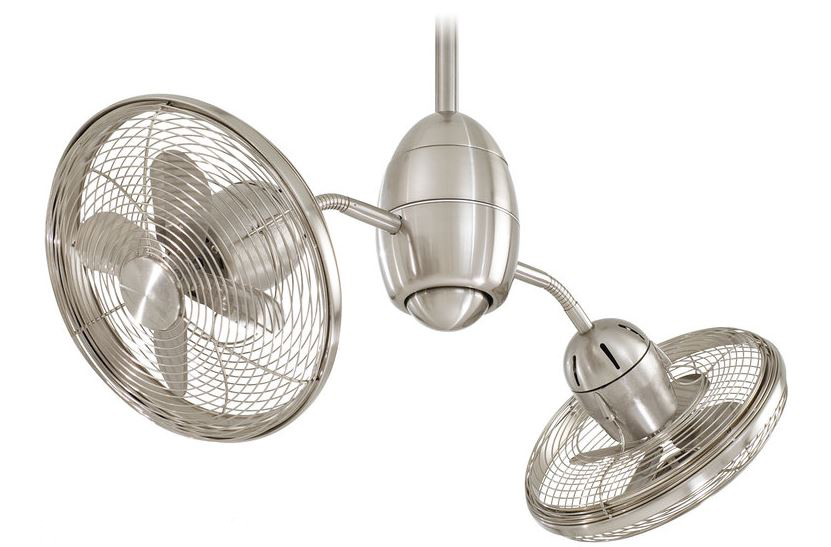
5 Gyrette Double Fan by MinkaAire

The Gyrette Double fan is a wind producing machine!  This fan is outdoor rated, so it can be used on your outdoor sitting and dining areas as well as screened in patios.  This fan is also available in a variety of colors.  The individual fan heads are independently adjustable and you can have it function as one, two or three fans in one.  This fan provides hours of entertainment for the remote control lovers in your life. Ceiling fans

We understand that choosing the right ceiling fan for your room can be a challenge.  If you are in the market for a new one, check out one or our past blog called: 5 Tips for Picking a Ceiling Fan. There is more to the perfect fan and creating the perfect space than just the look of a fan.  Function is important too.  If you are in the market for adding some new lighting and would like a little help upgrading your room, give us a shout.  We would love to help you out.


Click here to see more blog posts by Paula Ables Interiors


6 Steps to Remodeling your Kitchen by Paula

Whether you have lived in your home for 10 years or 10 weeks, everyone at some point wants to upgrade a part of their home.  We are here to show you how to get from Drab to Fab in 6 easy steps! Kitchen crop


1.  Assess your needs:

What is it about your current kitchen that you do not like?  Is it the color of the cabinets?  Would you prefer to have an open bar for guest to sit and it is currently a wall?  Would you like a larger kitchen?  Is there a way to add an island without breaking the bank?  These are just a few questions to get your juices flowing.

Before Kitchen After Kitchen
BEFORE                                                                              AFTER
(this BEFORE photo shows a dated, DIY two-tone paint.  The AFTER photo shows the upgraded taupe oil based paint. This simple paint change took the kitchen from 80's trendy to simple elegance)

2.  Come up with a budget:

No matter your budget, there is always the possibility to upgrade something.  If you only have a couple thousand to spend you can plan to repaint, add knobs and pulls to your cabinets or replace a few appliances.  Maybe you have a little more than that and would like new tile for the backsplash to go with your new counter tops and plumbing fixtures.  These are all great ways to breathe fresh air into a worn out space on a slightly tighter budget.  If you have been saving for an upgrade for years and you are ready to make your dream kitchen come true, then lets give the whole room a face lift!  I know the first thing you are thinking is "What is all of this going to cost?"  That is a tough question depending on what part of the country you live and your personal skill set.  I am a firm believer in hiring professionals to do the work rather than personally laying $80 a square foot mosaic tiles to save $200 in labor just because my neighbor said it was easy and risk a less-than-perfect finished product.  When setting your budget, plan to hire professional trades to walk you through the process.  They are not cheap but their knowledge and experience are invaluable when it comes to getting the finished product you are striving to accomplish.


 BEFORE                                                                                AFTER

3.  Do your Decorative Diligence:

There is a little homework to do, but think of it as helping fine tune your wants and needs through photos and blog posts.  Some fun sites to browse are Houzz, Pinterest, and Instagram.  Start collecting photos.  Make sure to mark on each photo what it is you like about it: paint color, pretty tile, the feel of the space, etc.  These are all great tools that you can later share with a professional to give them a better direction on the final product you would like to see.

 photo 9  Mills Overall2

 BEFORE                                                                                AFTER

4.  Hire a professional:

There is no reason to go it alone. Hiring a professional will save you time and money on your project as well as give you that picture perfect room you have been dreaming of all these years. Some professionals that would be an asset to your remodel project are a registered Interior Designer, Architect and Contractor. Interior Designers know more than what counter top will look best with what tile. They are able to see a space as it should be and are familiar enough with the project to help lead you step by step from beginning to end. We are the listeners, the organizers, the planners. It is our job to get you from your inspiration photo to the finished project as seamlessly as possible, all the while presenting you with ideas that you may not have considered before.  Depending on where you live you may need to hire an Architect to complete a set of construction documents for permitting purposes.  This is only true if you are moving walls, plumbing, lights, etc.  Check your neighborhood and city rules before beginning your project.  Contractors will save you a lot of headache and stress.  Their job is to keep the project moving by making sure each trade is in the right place at the right time.  The Interior Designer and the Architect have the ideas and the Contractor has the skill to pull them off.

Kitchen Remodel Existing Floor Plan   Kitchen Remodel New Floor Plan

 BEFORE                                                                                AFTER

5.  Start shopping:  

Now that you have counted your money, figured out what you want, done your research and hired a couple of professionals to lead the way, there is more fun to be had. It is time to start shopping. If you have hired an Interior Designer you can choose if you would like them to present a handful of options to you or if you would like to join them while shopping. Either way is fun for us and for you. We have a system to help lead you through the selections process. No stone will be left unturned. (We really will ask you where the most convenient spot is to reach for your Saran Wrap.) Once selections are made, we organize the information, get the bids lined up with all of the vendors and hand the info over to the contractor for purchasing.

130   01_gallery

 BEFORE                                                                                AFTER

6. Sit back and watch the magic:  

Even though you may be without your kitchen for a couple of weeks up to a couple of months, the final reveal will be worth the wait!  Your contractor has placed the orders and the Interior Designer will be in and out periodically to supervise and offer solutions as each trade is brought in to do their part.  The next thing you know you are enjoying your wonderful new kitchen!

Kitchen Remodel


Remodeling anything in your personal living or office space can have its inconveniences and challenges.  We would love to be there to walk you through the process.  Paula Ables Interiors is not your average Interior Design firm.  We have the knowledge and skills to go from the very beginning of your project to the end, starting with your remodel plans and construction documents all the way through selections.  If you are getting remodel fever and want to chat with a professional to help you get things started, give us a call.

(All projects pictured by Paula Ables Interiors, Photography by PAI and Coles Hairston)


Click here to see more blog posts by Paula Ables Interiors.

5 Tips for Picking a Ceiling Fan by Paula

5 things to consider when looking for the best ceiling fan for your room:

Ceiling fans...are they a necessary evil or a stylish accent to the room?

We all know how hot it gets in the Texas Hill Country summers!  To get some relief, many of us rely on ceiling fans to keep our homes comfortable.  Running a ceiling fan can make a room feel about 5 degrees cooler than it actually is.

If you are ready to upgrade your existing fan or looking to add one, here are 5 things to keep in mind before you make the purchase:

1. Size of your Space

It is easy to underestimate the size of the fan you need.  A 48" fan may sound big but if you install an undersized fan you won't get the air circulation you need to cool off.

A good rule of thumb is:

  • Rooms less than 150 sq. ft. - Use a 42-48" diameter fan
  • Rooms 150-350 sq. ft. - Use a 52-56" fan
  • Rooms greater than 350 sq. ft. - Use at least a 60" fan or you can purchase 2-48" fans

Below is an example of a large open-concept living, dining & kitchen space, where this 8 ft. Big Ass Fan serves as both a cooling unit and a WOW factor.

Isis- Engel's condo

2. Ceiling Height

When selecting a fan for your space, know your ceiling height.  If it is an 8' ceiling, your best solution is a ceiling-hugger style fan.  If your ceiling is 10'+, you may need to add additional down rods to accommodate the extra height.

The typical rule of thumb is for the blades of your fan to be 8-9 feet above the floor. As you see in the photo below, we added a 12" down rod to our fan to accommodate the 10' ceiling--placing the fan at the perfect height for this bedroom.

Tureen- Farleigh's fan

3. Type of Installation 

Another critical factor to take into account when shopping for a new fan is: sloped or flat ceiling?

Some fans include adapters for sloped ceilings, but not all have this capability. Some adapters can be purchased separately, but can have restrictions on the angle it will accommodate; so it is important to know these details if you have a vaulted or sloped ceiling.

Sometimes the best solution isn't a ceiling fan at all. In the image below, we used a wall-mounted, oscillating fan to blow the smoke away from the bar-b-que area.

*Make sure to look for a damp or wet rated fan if installing outdoors*

Bellows-Hock's

 4. Lighting

Light kits have gotten a bad wrap over the years and for the most part we agree.  Lights on fans are usually unattractive.  This being said, the fan companies have heard our plea.  Many have begun integrating lights into the fan itself making for a more complete and attractive look.

Which look do you like the best?  If you know you want a light, certain fans have customized options for you to pick the shape and globe style you want. Also, some fans that do come with a light, come with a cap in case you decide you do not want to use the light kit.

In the living room pictured below we capped the light because we loved the fan design, but the recessed cans in the room provided plenty of general lighting.

Artemis- Alex Smith's Condo

5. Style

Just like light fixtures, there are a wide variety of ceiling fan styles. To start with, there are contemporary and traditional fans. There are fans that have multiple blade material options--from clear acrylic, all the way to woven rattan.

Many times fans blend in to the ceiling because they are thought of as utilitarian, but there are plenty of styles that can take your fan from Blah to Tah-DAH.

Below is a unique example of a ceiling fan we used in a bedroom that is just as much art as function.

Meyda- Coe's fan

What ceiling fan is right for you?  What will fit best in your space?

Do you want to go from Blah to Tah-DAH with your lighting in a new or existing space?  We are here to help with great ideas and friendly purchasing advice.  Give us a shout to help transform your space.


Click here to see more blog posts by Paula Ables Interiors.